Wednesday, June 26, 2013

Project 2: Mani rig

For this project, it required us to animated a person walking.
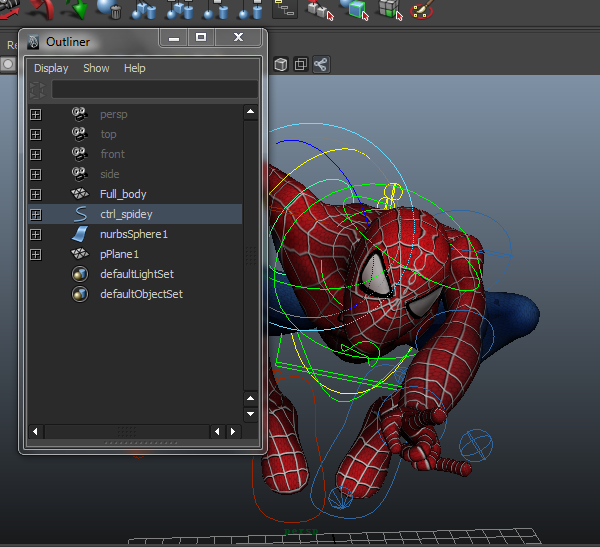
It was fairly easy since the character was readily rigged and there was a pdf file to guide us through the animation process.
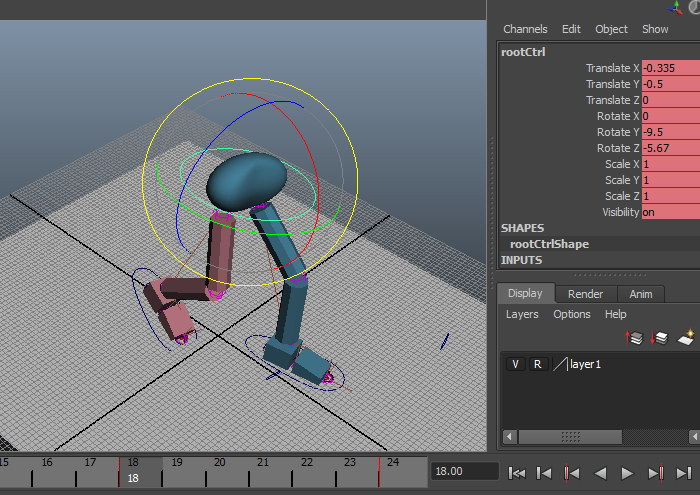
I had to adjust the curves on my graph because the movements are a little unusual at some parts.
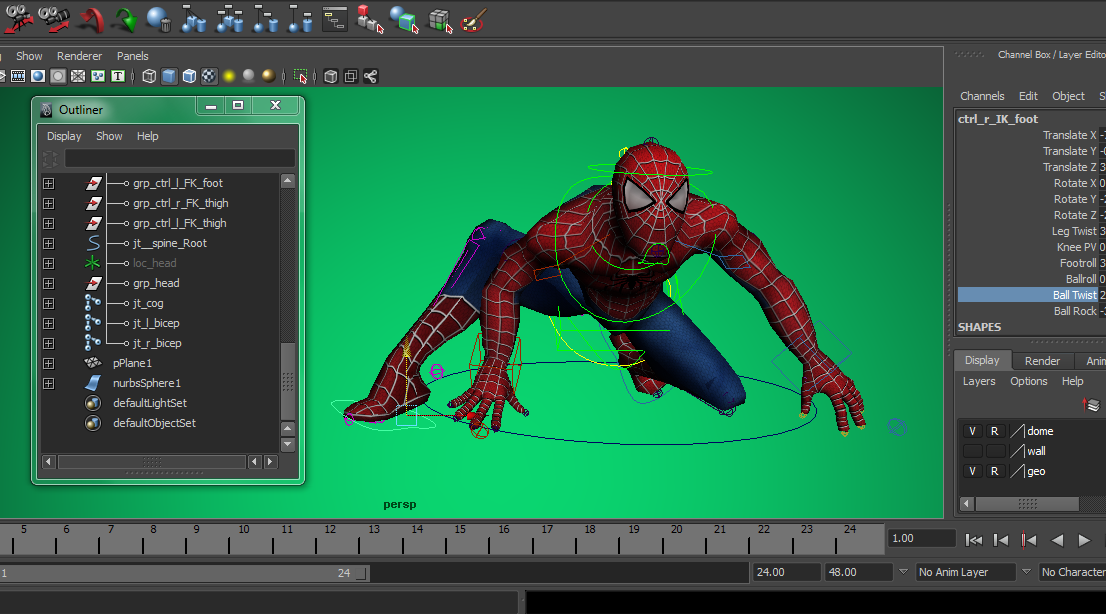
The feet movements are exaggerated since it's an animated character and it somehow looks unnatural yet funny. I also curled the fingers after adjusting the feet because they were too straight, making the character look really awkwardly stiff as it walked.
& here's the finished file playblast.


Because the video doesn't have an infinite loop.
I made compressed the frames into a gif image so it is easier to view.


The next part of this project, I chose to make the character take a step onto a box and jump off of it.
It took some time to adjust the feet so that it steps onto the box properly.
The first few times, the left foot kept intersecting the cube then emerging at the top of the surface of the box. Also, when i tried to make it jump, it looked as if it floated down because the number of frames between the take off and landing poses were too many.
The knees are bent as he prepares to jump and as he lands because the weight of the body is being pulled down.
I adjusted the hands to make the fingers spread out as he lands, to make it seem like he is trying to balance himself. After that, the hands move back into a more relaxed position - fingers curled.

& here's the playblast as well as a gif.


I think that there can be improvement for both parts of this project.
The rotation of the shoulders and thorax could be a little more obvious, as well as the swing of the arms as it walks. It still looks pretty stiff because the movement of the upper body are not moving as much.
As for the second part, the distance between the feet and the box as it takes a step up should be wider.
The lecturer also suggested the same since naturally, when a human climbs up a step, the feet would not be that close to the box, to the point that the heel/feet has to twist itself in an absolutely unnatural angle to avoid hitting the box. Also as it steps up, I should have arched the back a bit more because normally a human spine wouldn't be straight up when walking up. The jump itself is also very stiff. Although the arms spread out as he jumps, the body is very straight and unnatural. I should have increased the timing of the pause before it prepares to jump.
Overall, I enjoyed animating this character for the project. It was fun to make it walk with different moods (although I decided to do part3 instead of 2) as well as having it jump/land differently. Initially I wanted to make it land but lose balance and fall over. But I decided not to because I messed up the legs as it fell and somehow couldn't get it right.

Friday, June 21, 2013

Week 6: Walk Cycle

For this lab, we learnt to animate a bipedal character pair of legs.
 
We also added a slight sway to the pelvis of the pair of legs to give it more feminine character while walking.

The process was very easy because we just had to follow step by step instructions in the document as well as the lecturer's explanation and it is easy to understand. It was interesting as well and again, i did exaggerate the distance of the strides at one point which caused the joints to separate.

Week 6: Big Dog

Big Dog

Exercise 1

i) If engineered or programmed badly, BigDog would fall over. Watch the full video again, and describe how BigDog’s legs move while walking– ie. what is the sequence of leg movements for one complete step? Use the terms BL, BR, FL, and FR for the back-left, back-right, front-left and front-right legs.
FL BR, BL FR.
The FL & BR moves together at the same time, crossing over with the BL & FR.

ii) Explain how this sequence of movements manages to balance BigDog’s body weight.
When the FL & FR cross paths with each other, the distance between BL & BR increase to maintain the CG within the surface area of theBigDog. 
When the FL & FR cross paths with each other, the distance between BL & BR increase to maintain the CG within the surface area of theBigDog.

iii)     Look at BigDog_kick_slow_motion.mov. Draw a storyboard of BigDog stabilising itself after being kicked. (group work with Cindy)

Exercise 2
For our first lesson on animation of walking characters, we looked at how the Big Dog moves.
We had to take note of its key poses at certain points to replicate the walk in Maya.
Breaking down the animation process into key poses made it easier to animate.
We made use of the graph to adjust the movements, adding acceleration at some points (curves).
The legs were adjusted to crossover in different key poses.
Here's a playblast of the animation i did.

As you can see, it wasn't done very well because the legs are still sort of sliding along.
Overall, i could have done better adjusting the legs of the Big Dog. I messed up a couple of keyframes which made its movements very awkward.

Week 6: Spiderman

During this lab, we learned to adjust a spiderman rig into a relax posed.
It was mostly easy.

Then after that, we had to explore and pose spiderman in 2 other different poses as shown.


I moved the limbs too much and exaggerated the way it's limbs were placed at some point and it distorted the whole figure. So I had to be careful not to move it over a certain limit, to avoid having unnatural or uneven looking parts. I think i could have done better for the second pose because the right arm is a little twisted and the shoulders are not turned upwards. The calves also overlapped with the thighs a little in both poses. Also, for the first pose, it is shown in the photo reference that spiderman's thumbs are touching the ground. But the model didn't have long enough thumbs to actually reach all the way.
However, it was fun to work with.

Sunday, May 26, 2013

Project 1

For the first two weeks, we discussed the storyline of our project and what effects we wanted to use in the video. I helped with the drawing of the storyboard.
In the following week, we distributed the roles and tasks as to whom should do which effects.
This is the production pipeline of our project.
For my part of the project, I was tasked to create a 3D model of a lego cube, which is also the box containing a virus in our video.
Using Maya, i created a cube then adjusted its dimensions as well added other parts (the 2 cylinders on top the the box/lid) to have it resemble the lego cube used in the video.


Then also using Maya, Ii animated the box shaking (as if the virus inside is trying to escape).
When the box is unable to hold the virus any longer, the box jerks open.
(shown in the gif)

Here's a the playblast of the box without effects added.


Then I exported the image sequence and used After Effects to add in the particles.

I used an effect, CC Particle World to create various particles that explode out of the box. (As shown in the gif)
I adjusted the x, y and z controls to make the particles sort of fly towards the camera with guidance from this tutorial, http://www.videocopilot.net/tutorials/particle_explosion/.

Here's the rendered video to show how it looks.


And this is the final render of our project.

Overall, I think that this project is quite interesting as it requires us to model 3d objects and use them in our story. Teamwork and communication is also important as it allowed to work closely as a group and successfully produce results for this project. We were able to actively discuss what effects our project should have and how it should be done.
I volunteered to model the box since i had more interest in 3d modelling than After Effects. It took me a moment to recall how and what to use in Maya because it has been quite a while since I last used it. And although the end result did not actually turn out the way I thought it would, I enjoyed the process of making the video.

Week 2: Zombie

This week's lesson required us to place an animated 3d object into the rendered video of the image sequence from the first week. We had to place the running zombie and human at an angle such that it will look like it is part of the actual images.

This lab exercise was also easy for me because it was basically following instructions on how to do it.
It is pretty interesting as well as useful on how we can model objects & add them into videos for when we can't find the props we need.

Week 1, Lab 3

3. What are some important factors in matchmoving, ie. what factors contribute towards a successful or unsuccessful matchmove?
The 7 rules of matchmoving that contribute towards a successful matchmove are
  1. There must be something to track.
  2. Track things at different depths.
  3. Use helper frames (take at least 10 pictures from different angles)
  4. A little bit of foreground makes a better matchmove. (reveal camera position more accurately than anything else)
  5. We cannot track anything that moves.
  6. Avoid having have too much foreground.
  7. Use a scale reference. (measure the distance we will be tracking)

Week 1, Lab 1: MatchMoving

For the first lesson of this module, I learned how to use MatchMover to track points of objects in an image sequence. In the first exercise, we used auto tracking to track points of the lion statue.
Here's the rendered video.


We also learned to manually track points in a video and add in a 3d object.
& here's the video.

It looked complicated at first but it was relatively easy since we were given instructions in the pdf file.
Overall, I think auto tracking is much easier than manual tracking because sometimes manually, it is difficult to find good tracking points.